

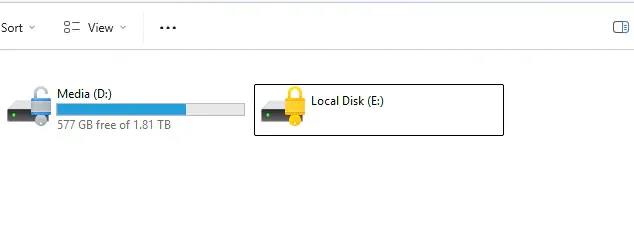
You just installed Windows 11, everything feels fresh and fast, and then you open File Explorer only to see lock icons on your secondary drives. If you've been through this, you know the panic — all your data is right there but completely inaccessible. For more details, check out Unlocking Your Internal Drives After Windows 11 Installation. For more details, check out 📝 IGCSE ICT June 2025 Paper 1 (0417/11) – Output Devices, Ap. For more details, check out 🛰️ IGCSE ICT June 2025 Paper 1 (0417/11) – Navigation System.
This is a common side effect of Windows 11's automatic BitLocker encryption. Here's what's happening and exactly how to fix it.
Why Are Your Drives Locked?
When you install Windows 11 on a modern PC (especially one with a Microsoft account), the installer often enables BitLocker device encryption automatically. This is a security feature — it encrypts your data so someone can't just pull the drive and read your files. It's great for laptops that might get stolen, but it's a pain when it locks your secondary storage drives after an install.
The important thing is: your data is still there. BitLocker isn't corruption or drive failure. You just need the right key.
Step 1: Sign Into Your Microsoft Account
BitLocker recovery keys are tied to your Microsoft account.
Make sure you're logged in to Windows with the same Microsoft account you used during installation.
If you used a local account during setup, you'll need to switch to a Microsoft account first: - Go to Settings > Accounts > Your Info - Click "Sign in with a Microsoft account instead"
Step 2: Retrieve Your BitLocker Recovery Key
Head to the Microsoft BitLocker Recovery Keys page at https://aka.ms/myrecoverykey. Sign in with your Microsoft account and you'll see a list of devices with their recovery keys.
Look for the device that matches your PC name. Each key is a long string of 48 digits grouped in blocks of 6. Copy the one for the locked drive.
Step 3: Unlock the Drive
Now that you have the recovery key, unlocking the drive is straightforward:
- Open File Explorer and click "This PC" in the sidebar
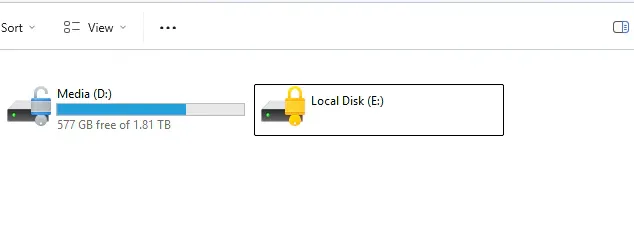
- Find the locked drive — it'll have a gold lock icon on it
- Right-click the drive and select "Unlock Drive"
- Paste or type the 48-digit recovery key and click Unlock
The drive should mount immediately and all your files will be accessible.
Step 4: Dealing with the Lock After Every Reboot
This is the part that catches people off guard: BitLocker-locked drives stay locked after every reboot. You'll need to unlock them each time unless you change the settings.
I know, it's annoying. As soon as you reboot, those lock icons are back. Here's how to fix it permanently:
Option 1: Disable BitLocker on the Drive
If this is a desktop PC that stays at home, you might not need encryption on secondary drives:
- Open Control Panel > System and Security > BitLocker Drive Encryption
- Find your locked drive and click "Turn off BitLocker"
- Confirm — it'll decrypt the drive (this can take a while for large drives)
Option 2: Add a Password to Unlock Automatically
You can set a password so Windows can unlock the drive without the recovery key:
- Open an elevated Command Prompt (right-click Start > Terminal Admin)
- Run:
manage-bde -unlock D: -RecoveryPassword YOUR-48-DIGIT-KEY - Then:
manage-bde -protectors -add D: -Password - Enter a password when prompted
After that, Windows will prompt you for the password on boot, which is more convenient than hunting down a recovery key.
Option 3: Save the Key to a USB Drive
If you prefer keeping encryption but want a physical unlock method:
- Plug in a USB drive
- Open Control Panel > BitLocker Drive Encryption
- Click "Manage BitLocker" on the locked drive
- Choose "Save your recovery key to a USB flash drive"
Insert the USB on boot and the drive unlocks automatically.
My Take on BitLocker for Home Users
Look, I get why Microsoft enables BitLocker by default — data breaches are real, and encryption is the best defense. But for a home desktop sitting in your living room, the tradeoff between security and convenience often leans hard toward convenience.
If your machine never leaves the house, I'd recommend either:
- Disabling BitLocker on secondary drives (turn it on for the OS drive if you want)
- Using a password protector with a memorable password you store in your password manager
The recovery key approach works in a pinch but gets old fast when you reboot for updates twice a month.
Quick Tips
- Backup your recovery key before you need it — save to a USB, print it, and store it in your password manager
- Check the status of any drive with
manage-bde -statusin the terminal - Disable auto-encryption on new installs by using a local account instead of a Microsoft account during setup (you can link your account later)
BitLocker is a good tool in the right context — just make sure you're the one deciding to use it, not the Windows installer.