

I've been using VirtualBox for development environments for years. The beauty of it is isolation — your host machine stays clean, you can blow away the VM when a project ends, and you get a true Linux environment without dual-booting or buying a second machine.
This guide walks through setting up a modern Python dev environment on Ubuntu inside VirtualBox, updated for the tools and workflows I use in 2025/2026.
Why VirtualBox for Python Development?
Before we get into the weeds, here's why this setup works so well:
- True Linux environment — no WSL quirks, no macOS/Windows differences to debug
- Snapshots — mess up your Python installation? Roll back in seconds
- Resource control — allocate exactly as much RAM and CPU as your project needs
- Portable — copy the VM folder to another machine and it just works
The tradeoff is a slight performance hit (about 5-10% for CPU tasks), but for most Python development work you won't notice it.
Prerequisites
- Host machine: 16 GB RAM recommended (8 GB minimum)
- VirtualBox: Latest version from virtualbox.org
- Ubuntu ISO: Download Ubuntu 26.04 LTS
- Disk space: At least 30 GB free on your host
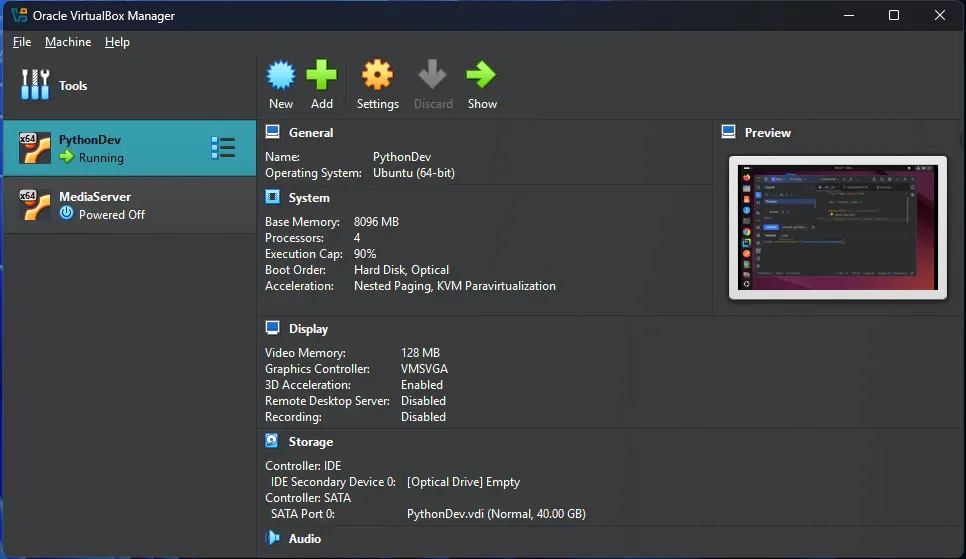
Step 1: Set Up the Virtual Machine
Open VirtualBox and create a new VM:
- Click New
- Name it
Python-Dev-2026, set Type to Linux, Version to Ubuntu (64-bit) - Allocate 4096 MB (4 GB) of RAM minimum — 8 GB if you have it
- Create a virtual hard disk: 25 GB dynamically allocated (minimum), VDI format
- Click Create
Network Configuration
For the best experience, set your network to Bridged Adapter instead of NAT:
- Select your VM > Settings > Network
- Change "Attached to" from "NAT" to "Bridged Adapter"
- This gives the VM its own IP on your network — useful for SSH, web servers, and API testing

VM Settings Tweaks
Before booting, make these adjustments:
- System > Processor: Give the VM 2-4 CPU cores
- System > Acceleration: Enable VT-x/AMD-V and Nested Paging
- Display > Video Memory: Bump to 128 MB
- Display > Graphics Controller: Set to VMSVGA
- Storage: Attach your Ubuntu ISO to the optical drive
Step 2: Install Ubuntu
Start the VM and you'll boot into the Ubuntu installer:
- Select Install Ubuntu
- Choose Normal installation (check "Install third-party software" for graphics drivers)
- Create a user account — I use
devas the username for simplicity - Choose Erase disk and install Ubuntu (this is the VM's virtual disk, not your real one)
- Complete installation, reboot when prompted, and remove the ISO from the optical drive
After reboot, log in and apply updates:
sudo apt update && sudo apt upgrade -y
Step 3: Install Development Essentials
Install the core tools you'll need for Python development:
sudo apt install -y build-essential curl wget git \
    libssl-dev zlib1g-dev libbz2-dev libreadline-dev \
    libsqlite3-dev libncursesw5-dev xz-utils tk-dev \
    libxml2-dev libxmlsec1-dev libffi-dev liblzma-dev
Step 4: Install Python (with uv — The Modern Way)
The system Python that comes with Ubuntu is fine for running system tools, but for development you want a clean, isolated Python install. I use uv — a Rust-based Python package and project manager that's significantly faster than pip.
curl -LsSf https://astral.sh/uv/install.sh | sh
Restart your shell or source the profile:
source ~/.bashrc
Now install the latest Python versions:
# List available Python versions
uv python list

# Install Python 3.13
uv python install 3.13

# Set it as the default
uv python default 3.13
Why uv over pyenv + pip? It's typically 10-100x faster at resolving dependencies, has built-in virtual environment management, and replaces pip, pip-tools, and pipx in a single binary.
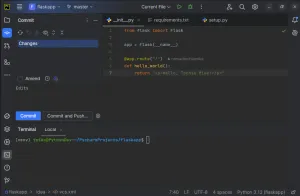
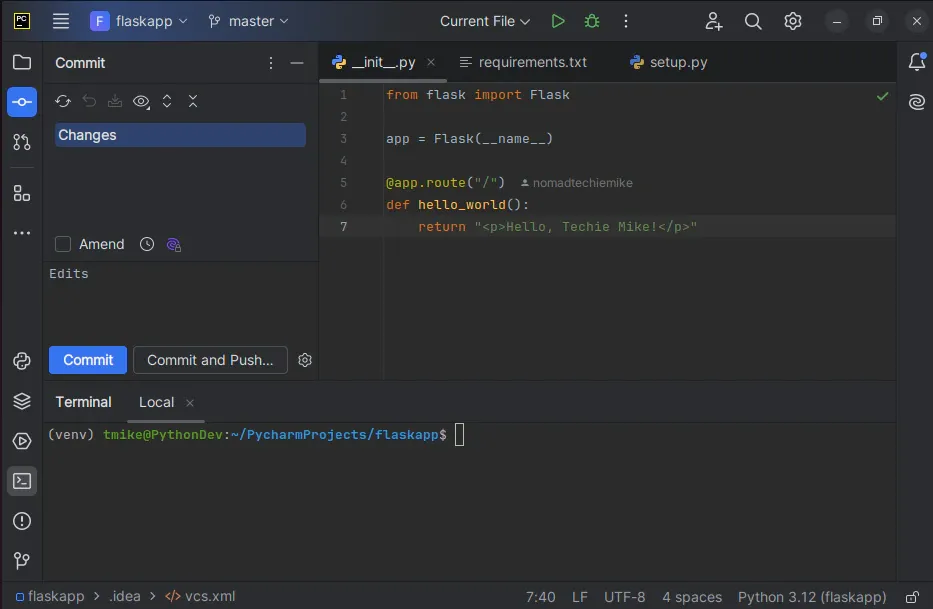
Step 5: Install PyCharm
I'm a PyCharm user for serious Python projects — the debugger, refactoring tools, and database integration are hard to beat. Install it via Snap:
sudo snap install pycharm-community --classic

For the Professional edition (if you have a JetBrains license):
sudo snap install pycharm-professional --classic
Launch it from the applications menu or terminal:
pycharm-community
Configure PyCharm with uv
In PyCharm, go to File > Settings > Project > Python Interpreter and click the gear icon > Add. Choose Virtualenv Environment > New, but point it to uv's Python:
~/.local/share/uv/python/cpython-3.13.3-linux-x86_64-gnu/bin/python3.13
Or better — use uv directly from PyCharm's terminal (Tools > Terminal) and let uv manage everything:
uv venv
source .venv/bin/activate
Step 6: Install VS Code (Alternative IDE)
Some projects work better in VS Code, especially if you're doing web development or using Jupyter notebooks. VS Code runs natively on Linux now with excellent performance:
# Install via Snap (simplest)
sudo snap install code --classic

# Or via the official .deb
wget -qO- https://packages.microsoft.com/keys/microsoft.asc | gpg --dearmor > packages.microsoft.gpg
sudo install -o root -g root -m 644 packages.microsoft.gpg /etc/apt/trusted.gpg.d/
sudo sh -c 'echo "deb [arch=amd64] https://packages.microsoft.com/repos/code stable main" > /etc/apt/sources.list.d/vscode.list'
sudo apt update && sudo apt install code
Recommended VS Code extensions for Python:
- Python (by Microsoft) — language support, debugging, linting
- Ruff — ultra-fast Python linter and formatter (replaces flake8 + isort)
- GitHub Copilot — AI pair programming
- Jupyter — notebook support inside VS Code
- GitLens — git history visualization
Step 7: Configure Your Python Toolchain
Ruff — Linting and Formatting
Install Ruff globally via uv:
uv tool install ruff
Create a pyproject.toml in your project root:
[tool.ruff]
line-length = 88
target-version = "py313"

[tool.ruff.lint]
select = ["E", "W", "F", "I", "N", "UP"]
ignore = ["E501"]

[tool.ruff.format]
quote-style = "single"
MyPy — Type Checking
uv tool install mypy
Pytest — Testing
uv tool install pytest
GitHub CLI
(type -p wget >/dev/null || sudo apt install wget -y) \
    && sudo mkdir -p -m 755 /etc/apt/keyrings \
    && wget -qO- https://cli.github.com/packages/githubcli-archive-keyring.gpg | sudo tee /etc/apt/keyrings/githubcli-archive-keyring.gpg > /dev/null \
    && echo "deb [arch=$(dpkg --print-architecture) signed-by=/etc/apt/keyrings/githubcli-archive-keyring.gpg] https://cli.github.com/packages stable main" | sudo tee /etc/apt/sources.list.d/github-cli.list > /dev/null \
    && sudo apt update \
    && sudo apt install gh -y
Authenticate:
gh auth login
Step 8: Create a Sample Project
Let's verify everything works by creating a quick FastAPI project:
mkdir myproject && cd myproject
uv init
uv add fastapi uvicorn httpx pytest pytest-asyncio
Create main.py:
from fastapi import FastAPI

app = FastAPI()

@app.get("/")
def read_root():
    return {"message": "Hello from VirtualBox Python Dev!"}

@app.get("/items/{item_id}")
def read_item(item_id: int, q: str | None = None):
    return {"item_id": item_id, "q": q}
Run it:
uv run uvicorn main:app --reload --host 0.0.0.0 --port 8000
Because you set up Bridged Networking in Step 1, you can access this from your host machine at http://<vm-ip>:8000. Find your VM's IP with:
hostname -I | awk '{print $1}'
Step 9: Install Postman for API Testing
sudo snap install postman
Postman is useful when you're building APIs and want to test endpoints without writing test scripts. Launch it:
postman
Step 10: Additional 2026 Tooling Recommendations
Docker
For projects that need containers alongside your development:
# Install Docker
sudo apt install docker.io -y
sudo usermod -aG docker $USER

# Log out and back in, then verify
docker run hello-world
just — Command Runner
If you're tired of remembering command syntax, just is like make but specifically designed for project task runners:
sudo snap install --edge just
Create a justfile in your project:
# Run the dev server
dev:
    uv run uvicorn main:app --reload

# Run tests
test:
    uv run pytest -v

# Format code
fmt:
    uv run ruff format .

# Type check
check:
    uv run mypy .
Starship — Shell Prompt
A fast, customizable prompt that shows your Python version and virtualenv:
curl -sS https://starship.rs/install.sh | sh
echo 'eval "$(starship init bash)"' >> ~/.bashrc
source ~/.bashrc
Snapshot Your Baseline
Once everything is installed and configured, this is the most important step: take a VM snapshot.
In VirtualBox: Machine > Take Snapshot. Name it "Python Dev 2026 - Clean Baseline".
Now you can experiment freely — install random packages, break things, try beta software. If it goes wrong, restore the snapshot and you're back to a clean environment in seconds. This alone is worth the VirtualBox setup time.
Summary
You've now got a fully-isolated Python development environment with:
| Tool | Purpose |
|---|---|
| uv | Python version management + package manager |
| PyCharm / VS Code | IDE (use whichever fits the project) |
| Ruff | Linting and formatting (replaces flake8, isort, black) |
| MyPy | Static type checking |
| Pytest | Testing framework |
| FastAPI | Web framework for sample project |
| Docker | Containerization when needed |
| Postman | API testing |
| just | Project task automation |
| Starship | Shell prompt with Python context |
This setup has been my daily driver for the last two years. It's clean, fast, and when a project gets messy, I roll back the snapshot and start fresh. Happy coding!
For more details, check out Setting Up a Python Development Environment on VirtualBox wi. For more details, check out Step-by-Step Guide: Setting Up Laravel with AdminLTE and Mul.
