

Someone on r/homelab posted a photo of a pile of old drives and asked one simple question: how do I determine which of these are still good? Every self-hoster ends up in the same position. Drives accumulate. Labels fade. One came out of an old desktop, one came from a USB dock, one has been in a drawer for three years, and now you have to decide what you can trust.
I do not make that decision from the drive's age or from one reassuring word in a terminal. I make it from SMART data, the right self-tests, and a very blunt rule: trends matter more than a single PASSED result.
That matters in my own setup. My homelab is not a theoretical diagram. I have a 465.8 GB Gigabyte NVMe boot drive in my Hermes host, a 931 GB P3 SATA SSD in my Proxmox box, and a 1.9 TB Solidigm NVMe handling local-lvm storage. Those are different drive types, different roles, and different failure patterns. The method is the same on all of them: pull the data, read the few numbers that matter, then decide whether the drive is fit for real work, background storage, or the recycling pile.
If you are building a small server around a Mini PC with upgrade room, like I described in my
 Techie Mike
This is the step people skip. They happily add an old disk, then act surprised when the machine starts queueing I/O or losing data six weeks later.
SMART data is useful, but only if you read the right parts
The first trap is believing SMART gives you one simple answer. It does not. smartctl -a gives you a wall of attributes, and most of them do not matter in the same way on every vendor.
These are the fields I care about first on an HDD or SATA SSD:
Reallocated_Sector_Ct: sectors the drive has already given up on and remappedCurrent_Pending_Sector: sectors the drive is worried about but has not remapped yetOffline_Uncorrectable: sectors it could not read properlyUDMA_CRC_Error_Count: usually a cable problem, not a dying driveTemperature_Celsius: context, not panic, but still worth watchingPower_On_Hours: useful background, not a verdict by itself
The mistake I see all the time is someone spotting one non-zero field and deciding the drive is dead. That is not how this works. A drive with stable numbers is a different story from a drive whose counts are growing every week.
This is why I think the overall SMART health line is nearly useless on its own. smartctl -H /dev/sda gives you PASSED or FAILED, and people treat that like an exam result. It is not. A drive can still say PASSED while collecting pending sectors and quietly moving towards the cliff. A drive can still report PASSED even when individual attributes are starting to deteriorate. By the time it flips to FAILED, you are already late.
My rule is simple: save the output, run it again later, and compare. If Reallocated_Sector_Ct sits at the same value for months, that is one conversation. If it grows from 0 to 3 in a week, that drive has started its decline.
smartctl -a /dev/sda
smartctl -H /dev/sda
There is another trap here: vendor interpretation. Seagate, WD, HGST and others do not all present raw values the same way. Raw_Read_Error_Rate is the classic example. On one vendor, a big raw number can be normal. On another, zero is what you expect from a healthy drive. If you copy the wrong interpretation from a random forum comment, you can talk yourself into binning a drive that is fine.
The USB dock problem catches almost everybody once
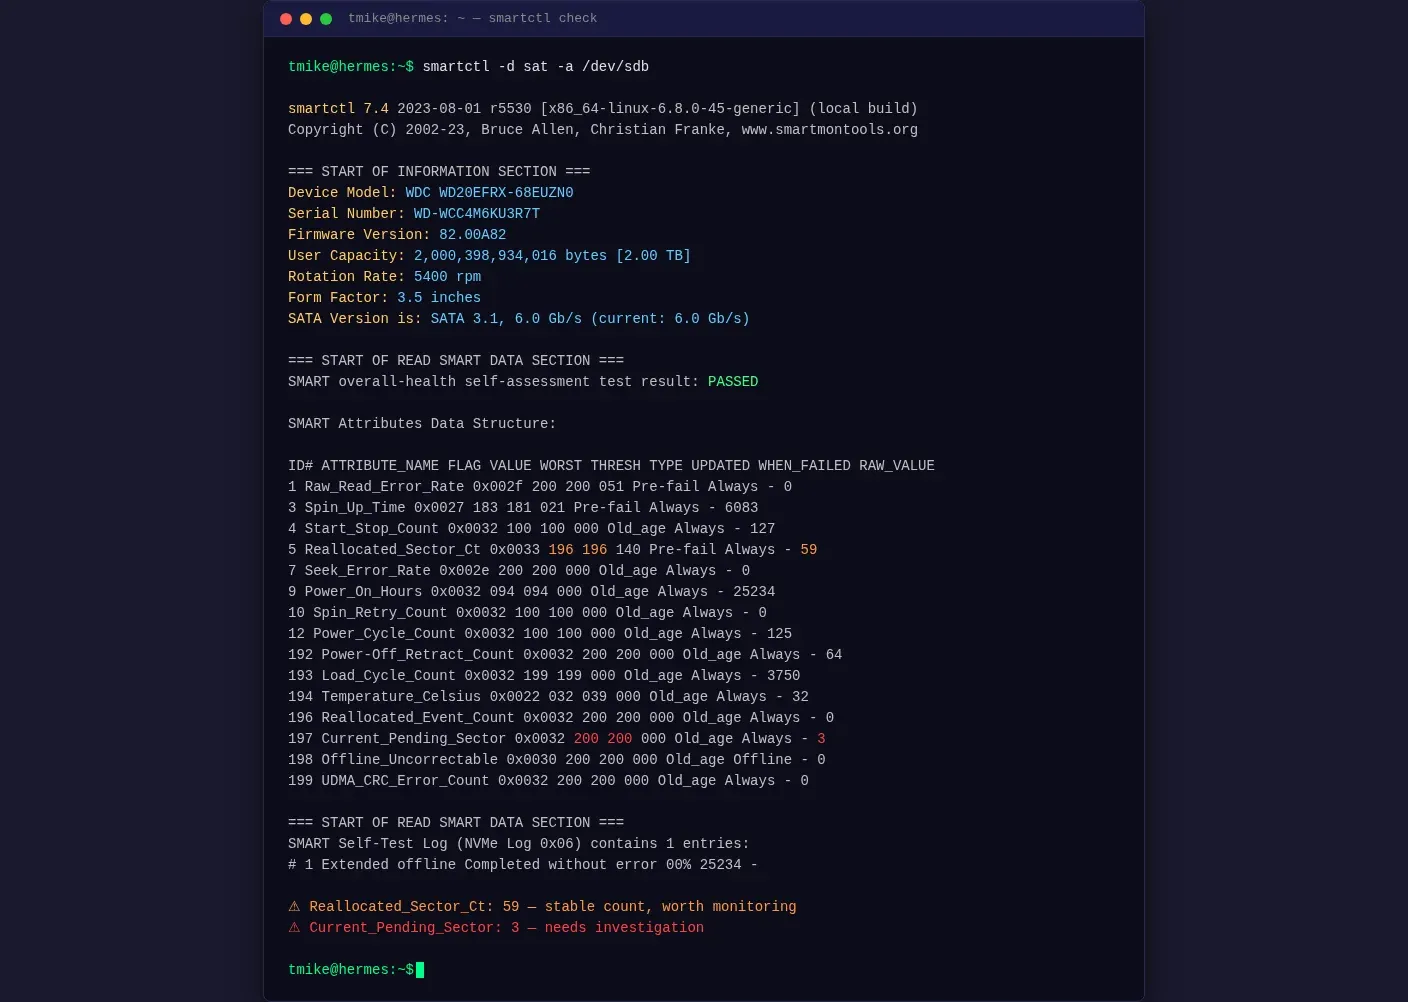
If you test old drives externally, this is the frustration you are likely to hit first. You run smartctl /dev/sdb and it tells you the device does not support SMART. Then you move the same drive to a direct SATA connection and suddenly the data appears.
The drive was not lying. The USB bridge was.
SMART is an ATA feature, and many cheap USB-to-SATA bridges do a poor job passing those commands through. In that case you need to tell smartctl what kind of translation layer it is dealing with.
smartctl -d sat -a /dev/sdb
Some bridges need device-specific flags such as -d usbjmicron or -d usbprolific, but -d sat is the one that fixes the problem most often. This is one of those details that wastes an hour the first time you hit it, because most tutorials quietly assume the drive is connected internally.
The tests that actually tell you something
If you only run -H, you are barely checking the drive. The useful test sequence is this:
smartctl -t short /dev/sda
smartctl -t long /dev/sda
smartctl -l selftest /dev/sda
The short test is the quick screen. It takes a couple of minutes and is worth doing on anything you have just pulled out of a drawer.
The long test is where the real evidence starts. That is the one that scans the surface properly and gives you a better chance of catching unreadable areas before you trust the disk with backups, media, or VM images. On large drives it takes hours, not minutes. On USB enclosures, it can also fail quietly if the enclosure sleeps or times out, which is why I always check -l selftest afterwards instead of assuming the command finished cleanly.
This is the same mindset behind my
 Techie Mike
assume components fail eventually, and design around that reality. In that post I made the point that I want a server I can rebuild quickly if an SSD dies. SMART checks are the maintenance version of the same philosophy. You are not trying to predict the future perfectly. You are trying to avoid preventable surprises.
badblocks is useful, but it is not the answer for every drive
People recommend badblocks like it is a universal health check. It is not.
For an old HDD you are about to reuse, badblocks can be very helpful. For an SSD, the wrong mode is a bad idea. For NVMe, it is the wrong tool entirely.
The two modes most people see are:
badblocks -n -sv /dev/sda
badblocks -w -sv /dev/sda
-n is the non-destructive read-write mode. It preserves the data already on the HDD, but it still writes across the disk, takes ages on large drives, and is something I would run only on an unmounted disk I am deliberately testing.
-w is destructive. It writes patterns across the disk and checks them. It is thorough, but it also erases the drive. More importantly, it is the wrong thing to do on SSDs because you are burning write cycles for no good reason. It is also a poor fit for SMR drives, where the translation layer can make the process painfully slow and occasionally misleading.
My rule here is straightforward:
- Old HDD with no data you care about:
badblocks -wis fine if you have time - Old HDD you want to keep intact:
badblocks -n - SATA SSD: skip destructive badblocks, use SMART and vendor tools instead
- NVMe SSD: use NVMe health data, not badblocks
That last point matters more now than it did a few years ago. My Hermes and Proxmox boxes both rely on NVMe somewhere in the stack. For those drives I care about Percentage Used, Media_Errors, and Critical_Warning far more than I care about old HDD-style surface testing.
nvme list
nvme smart-log /dev/nvme0n1
One number that gets misread a lot is Percentage Used. If an NVMe reports 50%, that does not mean the drive is half-dead in the dramatic way people imagine. It means the drive estimates it has used half of its write endurance. In a homelab boot role, that can still mean years of service left.
The one SMART problem that deserves immediate attention
If I had to pick one field that changes my tone fastest, it is Current_Pending_Sector.
A pending sector is a sector the drive is struggling to read reliably but has not remapped yet. That means you are in the awkward middle ground where the drive knows there is trouble, but it has not fully resolved it. Sometimes a forced read or write will clear the issue. Sometimes it will confirm the damage.
A simple read pass is often the first thing I would try. Before you run it, double-check the device name. dd is read-only in this example because the output is /dev/null, but disk commands are still the kind of thing you do not want to aim at the wrong drive.
dd if=/dev/sda of=/dev/null bs=1M status=progress
That forces the drive to read the entire surface, which makes it a useful diagnostic first step. After that, run smartctl -a again and see whether the pending count dropped, stayed the same, or grew. If the count is still there, the next meaningful change usually comes only when the drive manages a successful write to the bad area and remaps it. If it stayed or increased, I stop pretending the drive is trustworthy.
This is also where backups stop being a nice idea and become the actual point. In my self-hosting toolkit post, I mentioned backing up databases to an external drive with a simple cron job. That matters here because old disks are not where you should discover your backup strategy is imaginary.
My keep, monitor, or retire framework
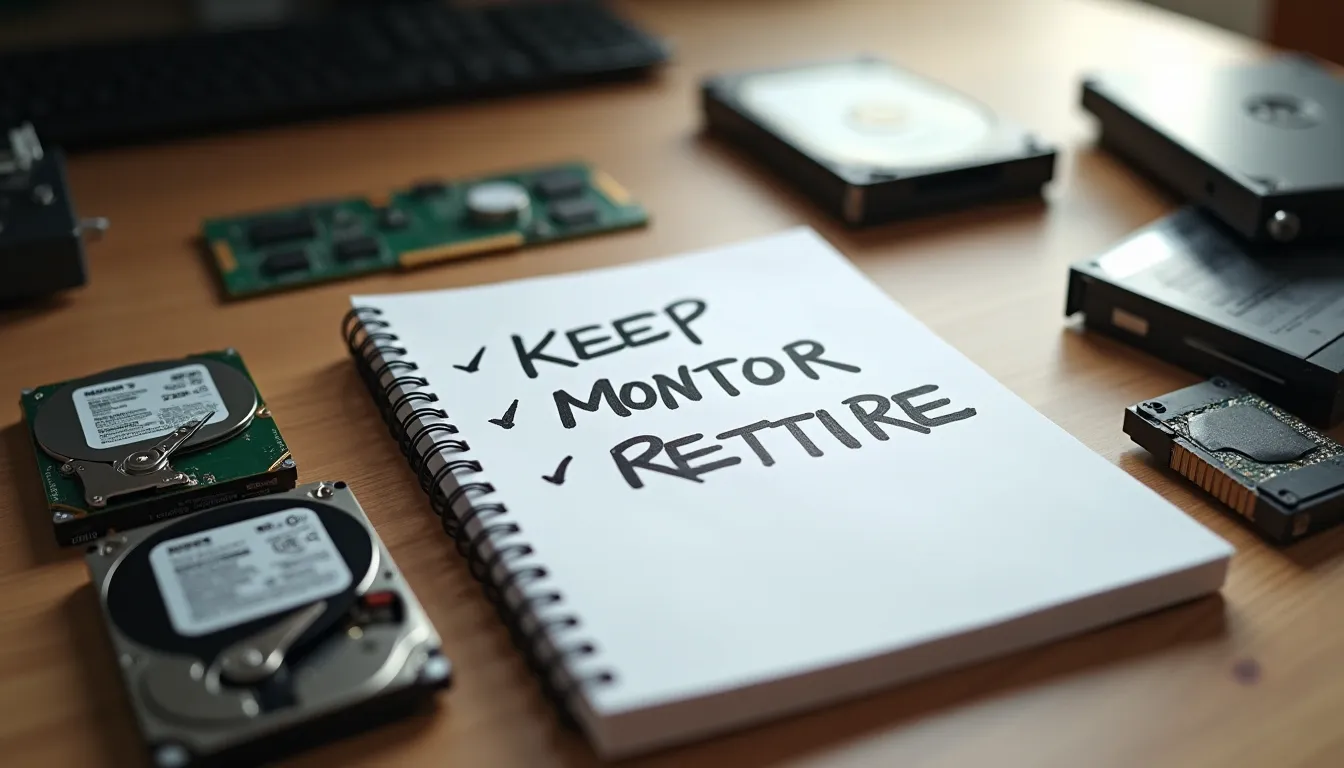
This is the decision table I would actually use.
| Result | Verdict | What I do |
|---|---|---|
| SMART attributes normal, self-tests clean | Keep | Fine for normal use |
| Reallocated sectors present but stable | Monitor | Use for non-critical work, check again later |
| Reallocated sectors growing | Replace soon | Do not trust it long term |
| Pending sectors above zero | Rescue or retire | Re-test after a read/write pass |
| Offline uncorrectable above zero | Retire | The drive has recorded unreadable sectors |
| UDMA CRC errors rising | Check cable first | Often not the drive itself |
 Drive Stats Team
line up with this. Reallocated sectors and pending sectors are far better warning signs than raw age alone. A 30,000-hour drive is not automatically worse than a younger one. A stable old enterprise disk can be less worrying than a younger consumer drive whose counts have started moving.
That is also a useful lesson for students. Storage hardware sounds tidy in the syllabus and messy in real life. In class you learn what sectors, flash cells, fragmentation and endurance mean. In the lab, you learn when those ideas turn into real decisions about remapping, wear, and whether a warning is just background noise or the start of a failure curve.
That is why I keep tying homelab work back to the classroom. The theory only really sticks when you have to decide whether the drive in front of you is safe enough to keep using.
Final point: stop asking if the drive is good or bad
That is the wrong question.
The useful question is this: what is the trend, what role do I want this drive to play, and how much failure am I prepared to tolerate?
A clean SMART report plus a completed long self-test is enough for me to keep using a drive. Stable minor warnings mean monitor it and keep it away from anything important. Pending sectors, growing reallocations, or uncorrectable errors mean I stop negotiating with it.
That is the method. Pull the SMART data. Run the real tests. Watch the trend. Then decide whether the drive belongs in your Proxmox node, your backups shelf, or the bin.