


If you're interested in privacy and security on Linux, you've probably heard of Parrot Security OS. It's a Debian-based distribution that comes packed with tools for penetration testing, digital forensics, and — the part I want to focus on here — anonymous browsing. In this guide, I'll cover two things: For more details, check out How to stay Anonymous online using the Parrot Sec OS. For more details, check out 🔒 IGCSE ICT June 2025 Paper 1 (0417/12) – Security, File Tra. For more details, check out How Hackers Actually Get Into Facebook Accounts (And How to .
- How to get Parrot OS running inside VirtualBox on your current machine
- How to use the built-in AnonSurf tool to route all your traffic through the Tor network
I've been using Parrot OS on and off since the v4 days, and it's come a long way. The current release is v7.2, which came out in May 2026, and it's the smoothest version yet. Let's get into it.
What Is Parrot Security OS?
Parrot Security OS is a rolling-release Linux distribution maintained by the ParrotSec team. It's built on Debian Testing, so you get up-to-date packages without needing to reinstall every six months.
The Security Edition comes with over 800 pre-installed tools — things like Metasploit, Wireshark, Nmap, Burp Suite, and of course, the anonymity tools we'll be using today. But even if you only care about the privacy side of things, Parrot is a solid everyday OS. It runs MATE as the default desktop, which is lightweight enough to work well inside a virtual machine.
System requirements for v7.2: - Quad-core processor (or better) - 4 GB RAM minimum (8 GB recommended) - 40 GB of free storage - 1024x768 minimum display resolution
These requirements haven't changed much over the years, which is one reason I keep coming back to Parrot — it doesn't demand brand-new hardware.
Downloading Parrot OS
Head over to parrotsec.org/download and grab the Security Edition ISO. The file is about 7.8 GB, so it'll take a while on a slow connection — kick it off and grab a coffee.
The download page offers two options: direct download and BitTorrent. I usually go with the torrent if I'm in a hurry — it's faster and you help seed for others. Whichever you choose, verify the SHA256 hash after downloading. Parrot publishes the hashes on the download page, and it's good practice to check them. I've seen too many students skip this step and then wonder why their ISO won't boot.
If you're on Linux, you can verify with:
sha256sum parrot-sec-7.2_amd64.iso\nCompare the output against the hash published on the Parrot download page. If they match, you're good.
Setting Up Parrot OS in VirtualBox

You don't need to install Parrot OS on bare metal to use it. In fact, for privacy and security work, a virtual machine is often the better choice — you get isolation from your host OS, easy snapshots, and you can trash and recreate the VM any time you want.
Step 1: Create a New VM
Open VirtualBox and click New. Fill in the details:
- Name: Parrot Security OS
- Type: Linux
- Version: Debian (64-bit)
- Memory: 4096 MB (or 8192 MB if your host can spare it)
- Hard disk: Create a virtual hard disk now — 40 GB dynamically allocated is fine
Don't worry about getting every setting perfect at this stage — VirtualBox's defaults work well for Parrot.
Step 2: Configure the VM
Before booting the ISO for the first time, I recommend adjusting a few settings. Select the VM and click Settings:
- System > Processor: Give it at least 2 CPU cores
- Display > Video Memory: Bump this to 128 MB
- Network: Leave as NAT for now — we'll talk about network modes later
- Storage: Under the Controller, click the empty optical drive, then the disk icon on the right, and choose your downloaded ISO
Step 3: Boot and Try Parrot Live
With the ISO attached, start the VM. You'll see the Parrot boot menu with several options. Select Live to boot into the live environment.
Parrot Security OS takes about a minute to boot in VirtualBox. You'll land on a MATE desktop with a welcome screen. Take a moment to look around — the layout is clean and functional.
Why live mode? It runs entirely in RAM and doesn't touch the virtual hard disk. Any changes you make (files you create, tools you install) are wiped when you shut down. For testing and learning, there's no safer way to get started.
Step 4: Installing to the Virtual Hard Disk (Optional)
If you want your changes to persist between reboots, you can install Parrot to the virtual disk. Double-click the Install Parrot icon on the desktop, and follow the prompts. The installer is straightforward — it's the standard Debian installer with a Parrot-themed makeover.
I usually tell newcomers to stick with live mode for the first few sessions. You can always install later.
Getting to Know AnonSurf


Now for the part I'm most excited about: AnonSurf. This is Parrot's pre-installed anonymity tool, and it's one of the best reasons to use the Security Edition.
Here's what makes it different from just running the Tor Browser: AnonSurf routes all your system traffic through the Tor network — not just browser traffic. That means your email client, your instant messenger, your package manager updates — everything goes through Tor.
This torification approach means no single application can accidentally leak your real IP. The only thing you need to be careful about is DNS leaks through applications that hardcode their own DNS resolution — but AnonSurf handles DNS interception too.
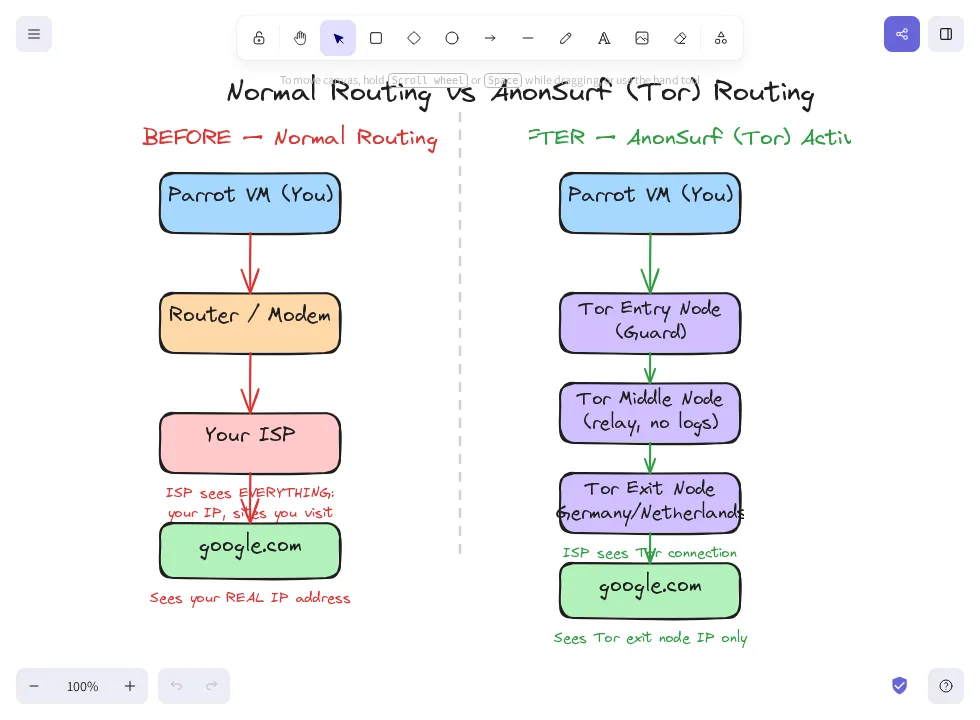
Before AnonSurf — See Your Normal Route
Let's verify that AnonSurf actually works. Open a terminal and run:
traceroute www.google.com\nThe output will show a path that starts with your VM's default gateway (within VirtualBox's NAT network) and then hops through your ISP's infrastructure. My output looked something like this — all my regular routing visible:
traceroute to www.google.com (142.250.80.4), 30 hops max, 60 byte packets\n 1 _gateway (10.0.2.1) 0.315 ms 0.288 ms 0.279 ms\n 2 * * *\n ...\nWrite this down or take a screenshot. You're going to compare it with the AnonSurf version in a minute.
Starting AnonSurf
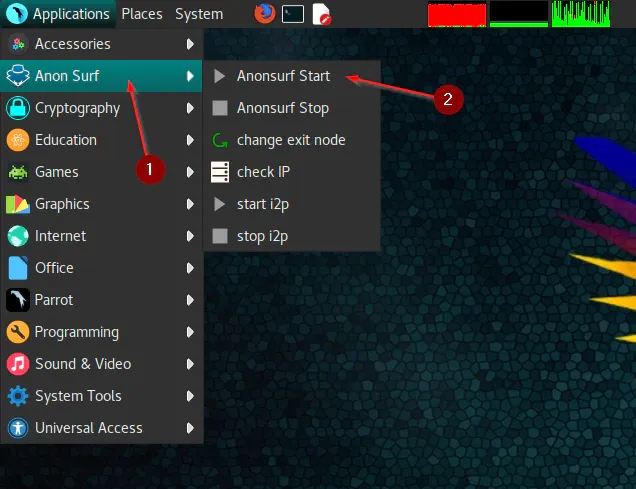
You can start AnonSurf two ways:
From the terminal:
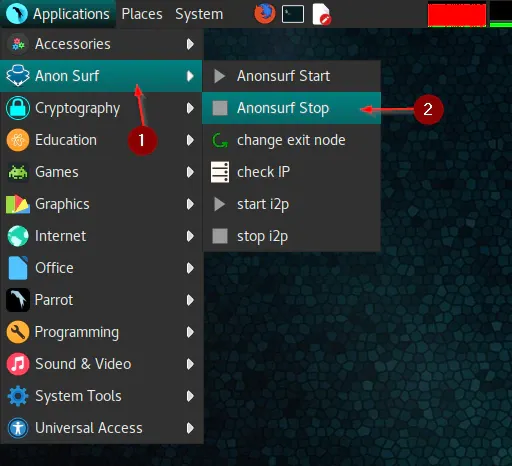
sudo anonsurf\nFrom the desktop menu: Click Applications > Anon Surf > Anonsurf Start
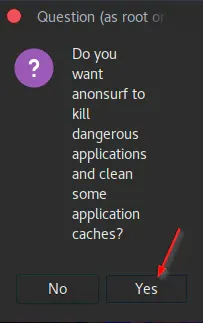
Either way, you'll be prompted for your root password. Parrot's default root password is toor (that's "root" backwards — it's a security OS convention, not a typo). You'll also get asked if you want to kill dangerous applications. Go ahead and say Yes — this closes any programs that might leak your identity, like BitTorrent clients or messengers that aren't Tor-aware.

Once it's running, you'll see a terminal confirmation that Anon Mode is active.
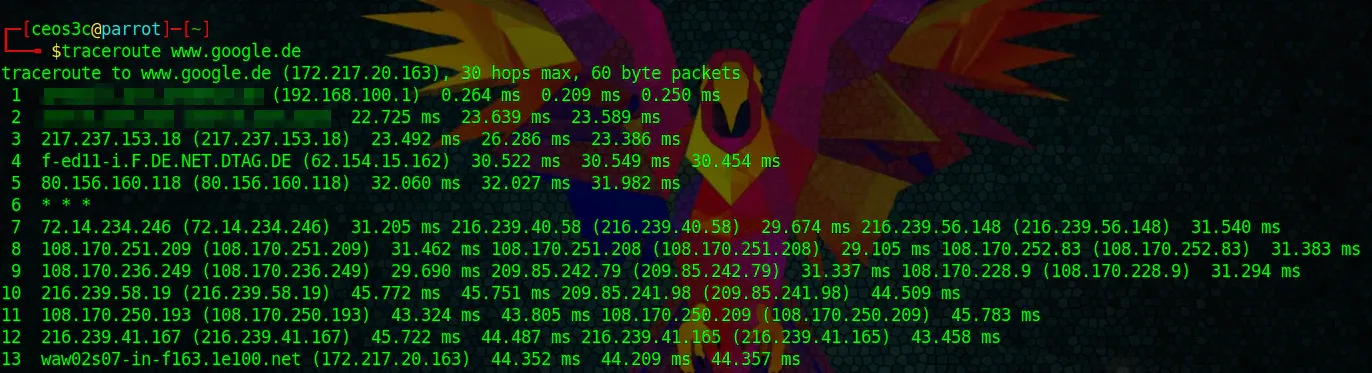
After AnonSurf — Trace the Same Route
Now run the traceroute command again:
traceroute www.google.com\nThis time the output should look completely different. Instead of your local gateway, the hops will route through Tor exit nodes. You'll see IP addresses from different countries — in my case, the trace ended up routing through nodes in Germany, the Netherlands, and then to Google's servers.
traceroute to www.google.com (142.250.80.4), 30 hops max, 60 byte packets\n 1 10.0.2.1 0.456 ms ...\n 2 * * *\n ... (all Tor nodes, no identifiable routing)\nThat's the Tor network doing its job. Every three hops, the path changes. Your ISP can see that you're connecting to Tor, but they can't see what you're doing over it.
AnonSurf Management Window
The AnonSurf application menu gives you several useful options:
- Start — Activates Tor routing
- Stop — Returns to normal routing
- Restart — If your current session feels slow, this gets you a fresh circuit
- Status — Check whether Anon Mode is active
- Change Exit Node (Country) — Force your traffic to exit Tor through a specific country. Some websites block Tor exit nodes from certain regions, so this is handy
- Check IP — Shows your current public IP so you can confirm the anonymization is working
I use the Check IP option frequently. It's a quick way to confirm that Tor is actually running before I start doing anything sensitive.
When to Use AnonSurf (and When Not To)
AnonSurf is great for privacy, but it's not perfect for everything. Here's my honest take:
Use it for: - Anonymous web browsing and research - Protecting your identity when investigating security topics - Accessing services in countries with restricted internet
Don't use it for: - Streaming video (Tor is slow — you'll buffer constantly) - Large downloads (same reason — Tor throughput is limited) - Anything that needs low latency (online gaming, video calls) - Any illegal activity — Tor is not a magic shield. AnonSurf and Tor won't protect you from law enforcement if you're doing shady stuff. Don't be stupid.
The speed trade-off is real. Tor bounces your traffic through multiple nodes, and each hop adds latency. But for the use case of protecting your identity while researching or browsing sensitive topics, it works surprisingly well.
Stopping AnonSurf
When you're done, disable AnonSurf to restore normal routing:
sudo anonsurf stop\nOr go Applications > Anon Surf > Anonsurf Stop
Your internet will switch back to the normal VirtualBox NAT routing immediately. Run traceroute www.google.com one more time to confirm the original path is restored.
Going Further with Privacy
AnonSurf is a powerful tool, but it's not the only way to stay anonymous. If you want to dig deeper, here are a few things to try:
- Whonix Gateway — Routes an entire virtual machine through Tor at the network level. It's more isolation than AnonSurf, but also more setup. I wrote a step-by-step guide on setting up Whonix that covers the details.
- Tails OS — A live OS designed for anonymity. It routes everything through Tor by default and leaves no trace on the machine. Great for when you need maximum privacy.
- VPN + Tor — Some people combine a VPN with Tor for extra protection. It's debated in the privacy community, but options like Private Internet Access or Mullvad work well with this setup.
- ProtonVPN or similar — For day-to-day privacy on your main machine without the speed penalty of Tor.
The key is matching the tool to the threat model. If you just want to browse a sensitive article or research security topics without leaving a trail, AnonSurf is perfect. If you need hardcore anonymity, look at Tails or Whonix.
Final Thoughts
Parrot Security OS remains one of my favorite Linux distributions because it makes security accessible. The AnonSurf tool is a perfect example — one command and your entire system traffic is routed through Tor. Pair that with VirtualBox for isolation, and you've got a solid setup for exploring privacy and security topics.
I've been using Parrot since the v4 days, and v7.2 is the most polished release yet. Whether you're a student learning about network security, a developer who wants to test applications over Tor, or just someone who values their privacy online, Parrot OS is worth the download.
Give it a try — the live environment means there's zero risk. Boot it up, fire up AnonSurf, and see the difference for yourself.
Got questions about Parrot OS or AnonSurf? Drop them in the comments below. I read every one.
