

In May 2026, researchers discovered a public GitHub repository maintained by a CISA contractor containing credentials, deployment material, internal documentation, and cloud infrastructure details, as detailed in Krebs on Security's report on the leak. CISA removed the repository and began investigating the exposure. The repository reportedly contained plaintext passwords, AWS tokens, certificates, infrastructure code, deployment files and internal documentation. Some credentials were reportedly still valid when discovered.
That is not the same thing as some dramatic headline about CISA getting completely owned. It is a repository leak, and that distinction matters. It also happens to be the part self-hosters should care about most, because this is exactly the kind of mistake that turns an ordinary lab into an easy target.
I think this is the more useful kind of security story anyway. A lot of homelab failures do not begin with a clever exploit. They begin with a secret in the wrong place, a service exposed longer than intended, or a trust boundary that only existed in your head.
Keep secrets out of repositories

The most direct lesson from the CISA incident is not about firewalls or VLANs. It is about credential handling.
Never commit passwords, API keys, private keys, access tokens, .env files, database exports, or backup archives to a repository. A repository named "private" is not a security control, and deleting a secret from the latest commit does not remove it from Git history.
At minimum: - keep secrets in environment files excluded by .gitignore - use a password manager or secrets-management system - enable repository secret scanning and push protection - rotate a credential immediately if it has been committed - inspect Git history, not only the current working tree - give tokens only the permissions and lifetime they require
A leaked credential should be treated as compromised even if there is no evidence that somebody used it.
That last point is where people still talk themselves into delay. They tell themselves nothing bad happened, so there is nothing to rotate. I do not buy that. If a token was in a public repo, the safe assumption is that it is gone.
The same principle showed up in my write-up on GitHub token theft through a VS Code bug. The bug mattered, but the real damage came from what a leaked credential could unlock after it escaped.
Audit what is actually exposed
A surprising number of homelabs run on assumption. The owner thinks only 80 and 443 are open because that is what they meant to expose six months ago.
Check it from the outside.
nmap -Pn yourdomain.com
sudo nmap -Pn -p- your-public-ip
The first command checks common TCP ports. The second scans all TCP ports and takes longer. UDP requires a separate scan.
Run the external scan against your known public IP from a device outside the home network. Do not rely on scanning a proxied hostname, because that may test Cloudflare's edge rather than your router or server.
Also, scan only systems you own or have permission to test. That should be obvious, but it still needs saying.
Then check the host itself:
ss -tulpn
That gives you the local listening sockets. The question is not just what is running. The question is what is reachable from somewhere it should not be reachable from.
If you self-host AI services, this matters even more because too many people publish them first and think about access control later. A service with weak or missing auth becomes a very different problem the moment it stops being localhost-only.
One blunt rule helps here: if you no longer remember why a port is open, close it until you do remember.
Put authentication in front of selected services
Weak authentication still causes more real damage than most fancy attack chains.
If a service supports MFA, turn it on. If it does not, put something in front of it that does. Authelia, Authentik, and Cloudflare Access are all reasonable ways to stop a login page from sitting naked on the internet.
This only works when users cannot bypass the authentication proxy and connect directly to the backend service. Restrict the origin with firewall rules, private networking, or binding to localhost where appropriate.
MFA and proxy authentication reduce the risk of stolen login passwords, but they do not necessarily protect API tokens, session cookies, application keys, or credentials that bypass the interactive login.
That is why I like layered controls more than single-product confidence. A reverse proxy is useful. A reverse proxy plus localhost binding plus tight firewall rules is better.
The point is the same either way: do not confuse a clean login page with real isolation.
Segment the network properly
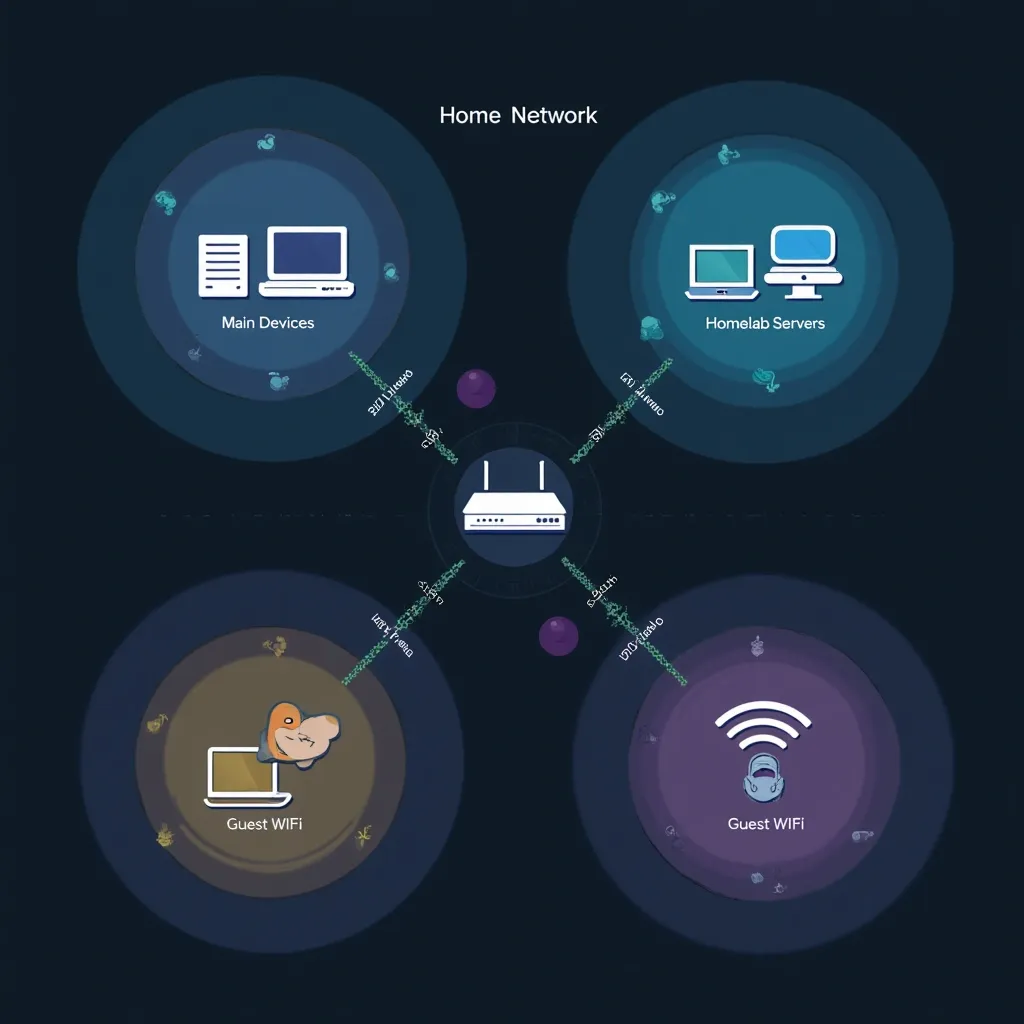
Flat networks are lazy, and they are generous to attackers.
If your laptop, phone, TV, random IoT plug, and Proxmox host all sit in one easy broadcast neighbourhood, one compromise can turn into a walk across your whole lab.
A simple layout is already better than the usual everything-on-one-LAN mess:
- Main devices: 192.168.10.0/24
- Homelab servers: 192.168.20.0/24
- IoT devices: 192.168.30.0/24
- Guest Wi-Fi: 192.168.40.0/24
Then make the policy boring and strict:
- Guest reaches the internet, not your servers
- IoT reaches only what it actually needs
- Admin access to Proxmox, SSH, and dashboards comes from your trusted network only
Different IP ranges alone do not provide segmentation. The network equipment must place them in separate VLANs or interfaces and enforce firewall rules between them.
That is the part people skip. Changing the third octet is not segmentation. Enforcing traffic boundaries is segmentation.
A compact setup is easier to secure because you can still explain it to yourself six months later. My
 Techie Mike
and the
 Techie Mike
both come back to the same point: extra complexity creates blind spots fast.
Add brute-force protection and rate limits
Anything with a login page gets hammered eventually.
If you expose SSH, a reverse proxy, a dashboard, or any admin panel, assume bots are already trying it. Fail2ban still earns its place here, but only if it is actually watching the right logs.
sudo apt update
sudo apt install fail2ban
sudo systemctl enable --now fail2ban
A healthy jail might produce output similar to this:
Status for the jail: sshd
|- Filter
|  |- Currently failed: 3
|  `- Total failed:     19
`- Actions
   |- Currently banned: 1
   `- Total banned:     4
Fail2ban must be connected to the correct application or proxy logs. When traffic passes through Cloudflare or another proxy, configure trusted proxy handling carefully so the system reads the real client address without trusting spoofed headers.
Pair that with firewall rules that make sense for the host.
sudo ufw default deny incoming
sudo ufw allow 80/tcp
sudo ufw allow 443/tcp
sudo ufw enable
sudo ufw status numbered
If you are doing this over SSH, stage the allow rules first so you do not lock yourself out.
Be aware that Docker manages its own firewall rules. A container port published on 0.0.0.0 may not behave as expected under a simple UFW policy. Check published ports with docker ps and test reachability externally.
Reverse-proxy rate limits help too. They will not make a weak stack strong, but they do remove easy wins from bots that rely on unlimited retries.
Patch deliberately and on schedule
Most self-hosters do not ignore updates because they are careless. They ignore updates because the process is vague, annoying, and easy to postpone.
That is why cadence matters. Pick a rhythm and make it boring.
For Docker-based services, I still prefer two separate habits: 1. notice that an image changed 2. decide when to roll it out
That is why I like tools such as Diun or Dockcheck. They tell you something moved without automatically changing production. Auto-update tools have their place, but I would be careful with anything that touches your reverse proxy, auth layer, or database while you are asleep.
A safer update cycle looks like this:
docker compose pull
docker compose up -d
Run it when you can watch the result.
If you harden containers, test those changes one at a time:
read_only: true
security_opt:
  - no-new-privileges:true
cap_drop:
  - ALL
Test these settings one at a time. A read-only container may still have writable volumes, and dropping every capability may break software that requires a specific capability. Add back only what the application demonstrably needs.
Start where the risk drops fastest
Do not turn this into a heroic weekend project.
Start with the fix that removes the most risk in your own setup. Sometimes that is rotating an exposed token. Sometimes it is closing a port you forgot about. Sometimes it is putting one fragile service behind a proper auth layer and binding the backend to localhost.
The CISA contractor leak is a useful warning because it is ordinary. There was no magic to it. Just credentials in the wrong place, followed by the usual cleanup.
That is exactly why homelab owners should pay attention.